Presence activation
To activate presence analytics, it is necessary to do the following configurations:
Configure network policy
Once we have agreed to HiveManager NG, it is necessary as a first step to configure the network policy to allow presence analytics activation. We go to "Configure -> Network Policies". Select the policy that contains the access points to activate (if no, we create it) . Let the "Device Templates" section and radio profiles in use:

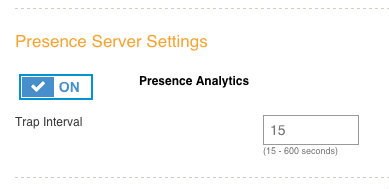
Click in each of them , and activate the "Presence Analytics " in the "Presence Server Settings" section:
Assign AP's
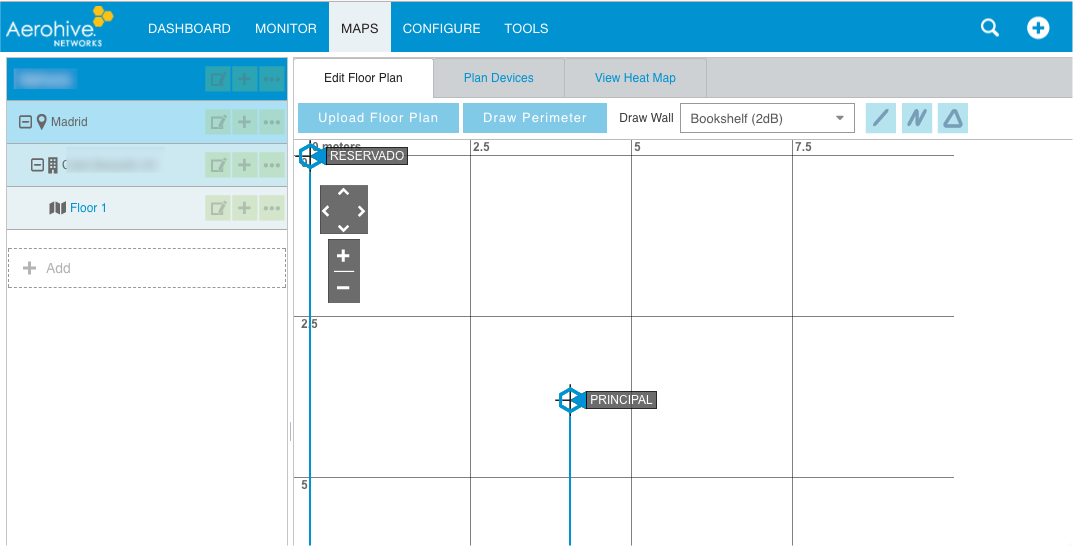
Assign AP's to a map (all presence calculations are made based on a map to know which ap's are in the same location).
Delivery to Flame platform
In the HiveManager NG , we access the Global settings section and go to the "API Data Management":

Then hit the '+' button to add a new configuration:

You must enter the 'Post URL', 'Access Token' and 'Message Type'. For this information, please send an email to the following address: support@flameanalytics.com putting the following subject and body:
“Aerohive presence settings [company name]”
In the mail body it will be necessary to put the mac's devices and which location they correspond.
Flame Analytics will reply to the email with the information needed to complete the configuration:
Post URL
Access Token
Message Type
Was this article helpful?
That’s Great!
Thank you for your feedback
Sorry! We couldn't be helpful
Thank you for your feedback
Feedback sent
We appreciate your effort and will try to fix the article